A camera that can tell the difference between someone waving and someone falling — that’s the practical promise of human activity recognition, and it’s a lot more achievable to build than it sounds. Whether you’re interested in fall detection for elderly care, form-checking for athletes, or flagging suspicious behavior on a security feed, the underlying approach is the same: track how a body’s key joints move over time, then classify that movement pattern as a specific activity.
YOLO Pose has become one of the most practical tools for doing exactly this, combining fast object detection with detailed body keypoint tracking in a single model. This guide walks through what human activity recognition (HAR) actually involves, how YOLO Pose fits into it, and how to build a working project of your own from the ground up.
What Is Human Activity Recognition?
Human activity recognition is the task of teaching a computer to identify what a person is doing — walking, running, sitting, falling, waving — by analyzing video, images, or sensor data. Rather than just detecting that a person is present in a frame, HAR goes a step further and interprets what they’re doing.
How It Actually Works
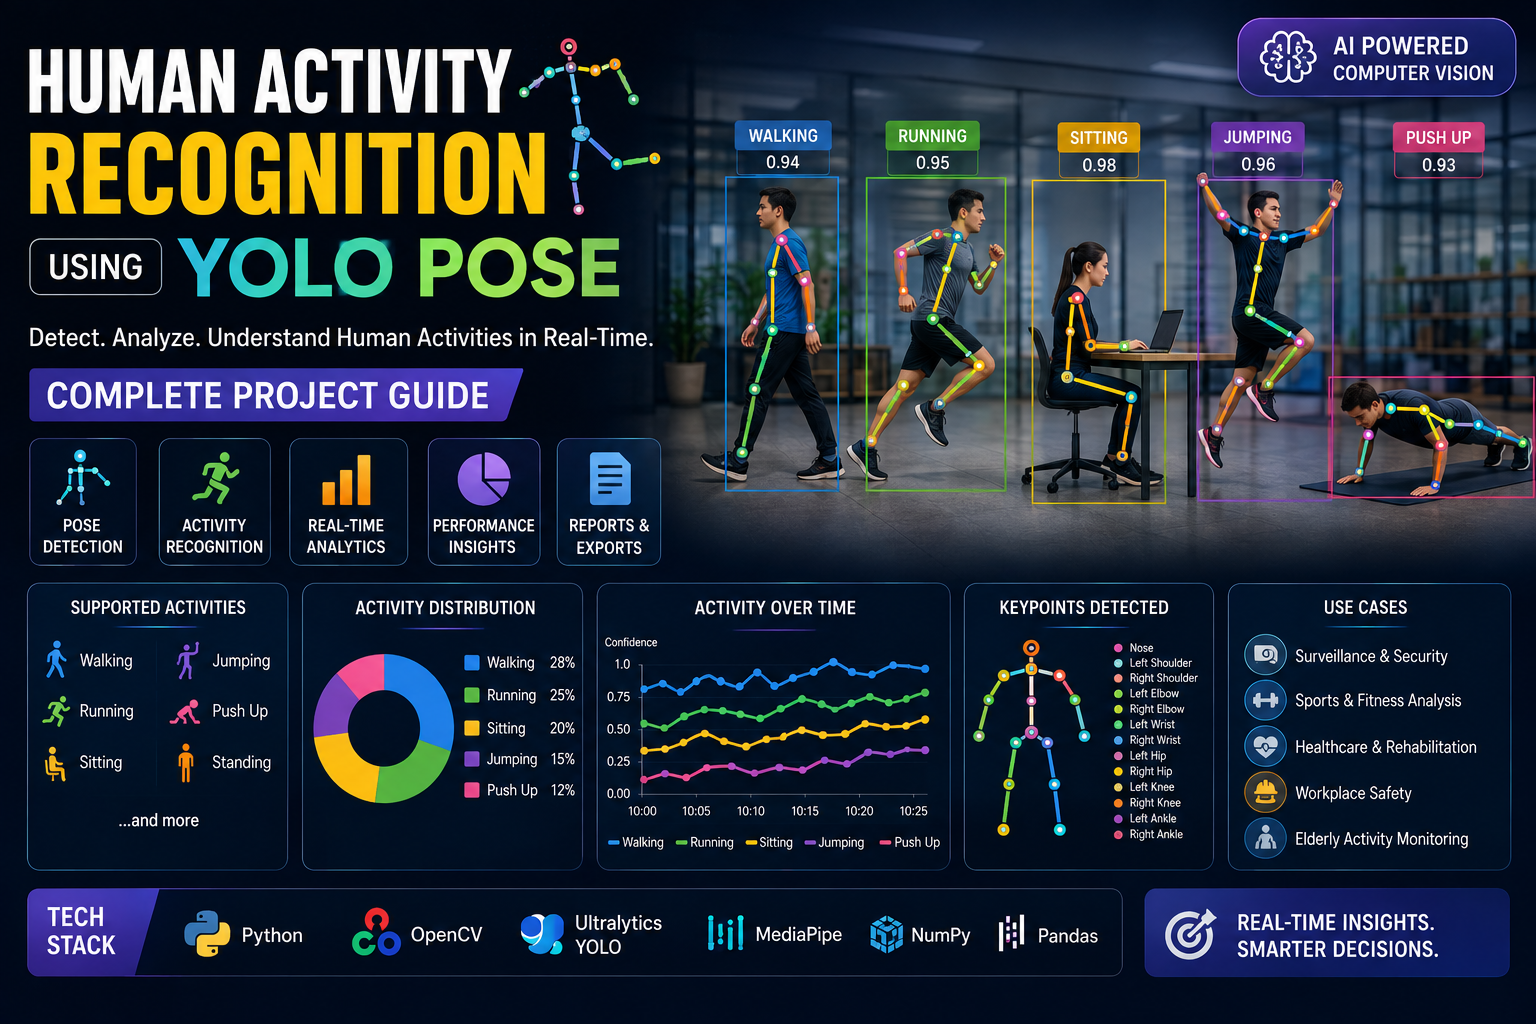
The typical approach starts with pose estimation — mapping a person’s body joints (shoulders, elbows, knees, wrists, and so on) into a set of keypoints. As these keypoints shift across consecutive video frames, an algorithm analyzes the pattern of movement and classifies it as a specific activity. The quality of this classification depends heavily on two things: how accurately the keypoints are detected in the first place, and how well-labeled the training data is that taught the model what each activity actually looks like.
Where HAR Gets Used
This technology shows up across a surprising range of fields: healthcare systems that monitor patients for falls or unusual behavior, sports programs that analyze athlete technique and training performance, security systems that flag suspicious activity automatically, smart homes that adjust lighting or climate based on occupant activity, and interactive applications like gaming and human-computer interfaces that respond directly to movement.
The Real Challenges
HAR isn’t trivial to get right. Occlusion — when part of the body is hidden from the camera — throws off keypoint detection. Every person moves slightly differently even when performing the “same” activity, which makes generalization harder than it first appears. Lighting and background variation affects detection reliability, real-time applications demand fast processing without sacrificing accuracy, and building a good model requires substantial, well-labeled training data — which itself raises legitimate privacy questions around collecting footage of people’s movements.
Why YOLO Pose Is a Strong Choice for This
YOLO Pose extends the core YOLO object detection architecture to also predict body keypoints — meaning it detects and poses-estimates people in a single, fast pass through a neural network, rather than requiring two separate models chained together.
How It Works Under the Hood
Using one neural network, YOLO Pose both locates people in an image and predicts the position of their body joints — elbows, knees, shoulders, and the rest — in one integrated step. Because this happens in a single pass rather than a multi-stage pipeline, it’s fast enough for real-time video, and it holds up reasonably well even in crowded or visually complex scenes.
What Sets It Apart
Compared to many traditional pose estimation methods, YOLO Pose tends to run faster and requires less computing power, which matters a lot if you’re aiming for live video analysis rather than offline processing. It’s also relatively straightforward to train and deploy, and it naturally handles multiple people within a single frame — a genuinely useful property for real-world settings where you’re rarely tracking just one isolated subject.
Practical Use Cases
Beyond generic activity labeling, YOLO Pose is well suited to things like monitoring whether a physical therapy exercise is being performed correctly, helping coaches analyze an athlete’s movement mechanics, and supporting security systems that need to flag unusual behavior patterns automatically.
Step 1: Set Up Your Environment
Hardware and Software You’ll Need
A machine with a reasonably capable GPU will make training and real-time inference far more practical — pose estimation is computationally heavier than plain image classification. Aim for at least 8GB of RAM, install Python 3.7 or later, and use a proper IDE like VS Code or PyCharm to keep your project organized as it grows.
Installing Dependencies
With your Python environment active, install the core libraries you’ll need:
pip install opencv-python torch numpy ultralytics
If you’re working from a project with a requirements file, a single command handles everything at once:
pip install -r requirements.txt
Step 2: Prepare Your Dataset
Choosing Which Activities to Recognize
Start with activities that are visually distinct from one another — walking, running, sitting, jumping are good first choices precisely because they don’t overlap much in how they look. Save more subtle or similar-looking movements for later, once your pipeline is working reliably; trying to distinguish near-identical actions from the start is a common source of early frustration.
Collecting and Annotating Data
Gather video or image footage of people performing each target activity, then label that footage with both body keypoints and an activity tag. Annotation tools like CVAT or LabelImg support keypoint-level labeling, letting you mark joints like wrists, elbows, knees, and ankles precisely across your dataset.
A few practices meaningfully improve data quality: review annotations regularly for errors and inconsistency, capture footage across different people, clothing, and backgrounds so the model generalizes rather than memorizes a narrow set of conditions, and keep the number of examples roughly balanced across activity classes so the model doesn’t develop a bias toward whichever action has the most samples.
Organizing Your Files
Keep images and their corresponding label files in clearly separated folders, split into training and validation sets. This structure isn’t just tidiness — it directly affects how smoothly your training pipeline runs later.
Step 3: Train the YOLO Pose Model
Configuring the Model
Choose a model size that fits your available hardware — smaller variants train faster but trade off some accuracy, which is a reasonable compromise while you’re still iterating on your pipeline. Set the number of keypoints your model should track, and split your prepared dataset into training and validation subsets before you begin.
Running Training
Training happens over a series of epochs, with the model comparing its predictions against your labeled ground truth and adjusting after each pass. A rough starting command with the Ultralytics YOLO Pose implementation looks like this:
yolo pose train model=yolov8n-pose.pt data=your_dataset.yaml epochs=100 imgsz=640
Save checkpoints regularly so you don’t lose progress if something interrupts a long training run, and use data augmentation — flipping, scaling, slight rotation — to add variety to your training data and help the model generalize to conditions it wasn’t explicitly trained on.
Monitoring While It Trains
Watch your loss value drop over successive epochs as an indicator of learning progress, and keep a close eye on validation loss specifically — a training loss that keeps improving while validation loss stalls or rises is a classic sign of overfitting. Periodically visualizing pose predictions on validation images is also one of the fastest ways to catch keypoint detection problems visually, before they show up as a confusing accuracy number.
Step 4: Evaluate Model Accuracy
Metrics Worth Tracking
A few standard metrics give a well-rounded view of performance: accuracy (how often the model gets it right overall), precision (of the actions it flags, how many are correct), recall (of the actual actions present, how many it actually catches), and F1 score, which balances precision and recall into a single number when neither alone tells the full story.
Testing Beyond the Lab
A model that performs well on your validation set can still struggle in the real world, so it’s worth deliberately testing on footage with different lighting, camera angles, and backgrounds than what appeared in training. This step tends to surface issues that a clean, controlled test set simply won’t reveal.
Iterating on Results
Improving a HAR model is rarely a one-shot process. Expect to gather more diverse data to cover edge cases you missed, fine-tune with updated training sets as problems surface, lean on data augmentation to stretch your existing data further, and adjust model parameters based on what your evaluation actually shows rather than guessing.
Step 5: Build the Real-Time Recognition Pipeline
Setting Up Real-Time Processing
A working real-time system captures video frames continuously, runs each one through YOLO Pose to extract keypoints, and feeds those keypoints into an activity classifier that assigns a label to the detected motion. Keeping this pipeline running smoothly — without frame drops or growing lag — depends on hardware that can keep pace with your chosen model size and video resolution.
Handling Multiple People at Once
In any real-world footage with more than one person, the system needs to track each individual separately — assigning unique IDs and keeping each person’s keypoints grouped independently, rather than accidentally blending movement data from different people together. This is what allows accurate, individual activity labels even in a crowded scene.
Balancing Speed and Accuracy
Real-time performance almost always involves tradeoffs. Reducing input resolution or choosing a lighter model variant speeds things up, while techniques like pruning unnecessary model layers or applying quantization reduce computational load further. The right balance depends entirely on your application — a security system monitoring a busy plaza has very different speed and accuracy needs than a single-subject physical therapy tracker.
Troubleshooting Common Problems
Occlusion
When part of a person’s body is hidden from view, pose detection accuracy drops. Using multiple camera angles helps reduce blind spots, and deliberately training on data that includes partial occlusions teaches the model to handle missing keypoints more gracefully. Smoothing filters applied over time can also reduce erratic pose predictions caused by brief occlusion.
Noisy Data
Bad lighting, shadows, or camera shake all introduce noise that degrades results. Cleaning out blurry or poorly lit frames before training, applying data augmentation to add robustness, and smoothing pose point predictions over time all help reduce the impact of noisy input.
Model Parameter Tuning
If results are underwhelming, revisit your confidence threshold — too low and you get false positives, too high and you miss real detections. Adjusting input image size trades speed for accuracy in a fairly direct way, and experimenting with the number of training epochs helps avoid both underfitting (too few) and overfitting (too many).
Where This Technology Is Headed
Sensor fusion: Combining camera-based pose data with wearable sensors like accelerometers and gyroscopes adds a physical dimension pure vision can miss, helping the system handle complex or ambiguous motions more reliably.
Broader activity coverage: Most current systems recognize a fairly limited set of activities. Expanding into subtler gestures and multi-person interactions will make HAR systems useful across a much wider range of real-world scenarios.
Transfer learning: Rather than training a model from scratch for every new environment, transfer learning lets existing models adapt faster to new conditions or subject populations, cutting down significantly on how much new data a project actually needs.
Final Thoughts
Building a human activity recognition system with YOLO Pose is a genuinely approachable project once you break it into its component steps — set up your environment, gather and annotate data, train the pose model, evaluate honestly, and then build out the real-time classification pipeline on top. Start with a small, clearly distinct set of activities, get that pipeline working end to end, and expand your scope only once the fundamentals are solid.
The tools here are largely open-source and well documented, which means the biggest barrier to a working project isn’t access to technology — it’s simply getting started and iterating from there.